Setting Scenes from Scratch
Setting up a scene from scratch is quite simple, you will only need two types of nodes: some props and an Interactor. Note the deliberate use of “some” for props and “an” for Interactor: this asset supports only one Interactor per scene, but many props can be added simultaneously.
To set up the Interactor, you will need:
One
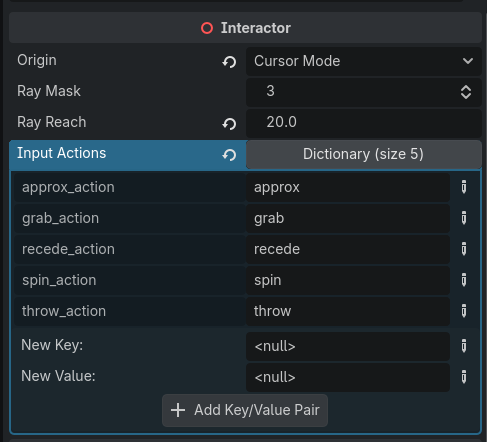
Node3Dnamed as you wish, with theInteractor.gdscript from thecoredirectory attached to it.Once in the scene, configure the following properties in the Inspector:
Origin: defines the interaction mode. Can be either
CURSOR_MODE(recommended for top-down scenes) orCAMERA_MODE(recommended for first-person scenes).Ray Mask: should match your Props’ collision mask to ensure proper detection.
Ray Reach: defines how far the Interactor can detect an object.
Input Actions: maps the interactions to the corresponding actions in your project’s Input Map.
To set up a Prop, you will need:
One
Node3Dnamed as you wish, with theProp.gdscript from thecoredirectory attached to it.One
RigidBody3Das a child of theNode3D, along with itsMeshInstance3DandCollisionShape3D.Once in the scene, configure the following properties in the Inspector:
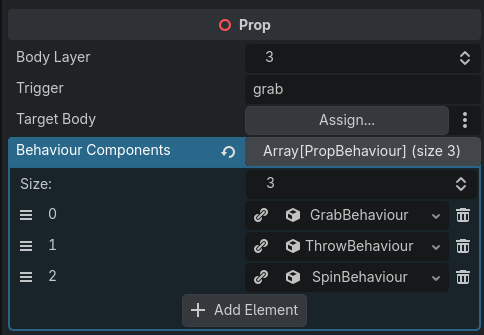
Body Layer: should match the
Interactor’s Ray Mask for proper detection.Trigger: the input action that initiates the interaction when pressed.
Target Body: optional if you follow the
Node3D (Prop) → RigidBody3Dhierarchy; required otherwise.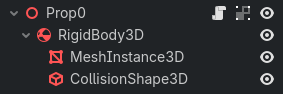
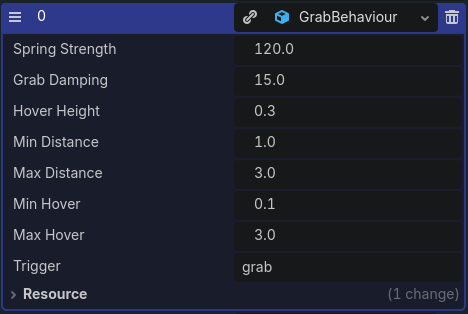
Behaviour Components: the resources that define what the Prop is capable of. Without at least one behaviour assigned, the Prop will not respond to any input.
To streamline the instantiation of props, you can configure a single one and duplicate it as needed, or save it as a scene and reuse it as a template throughout your project.
Some behaviours use signals to communicate with systems outside the prop interaction system.
These signals are automatically routed as follows: prop_behaviour → prop → interactor,
and should be connected from the latter. For instance, the spin_behaviour emits the set_camera_mov_status
signal to lock camera movement whenever necessary. For this to work correctly, the signal must be connected from
the Interactor on the node responsible for camera control (where the corresponding script is attached),
and a variable must be created to be driven by that signal. Refer to the first-person demo for a practical example.